Menu
Contact us
Storage requirements
Temperature monitoring & reporting
Wastage & returns
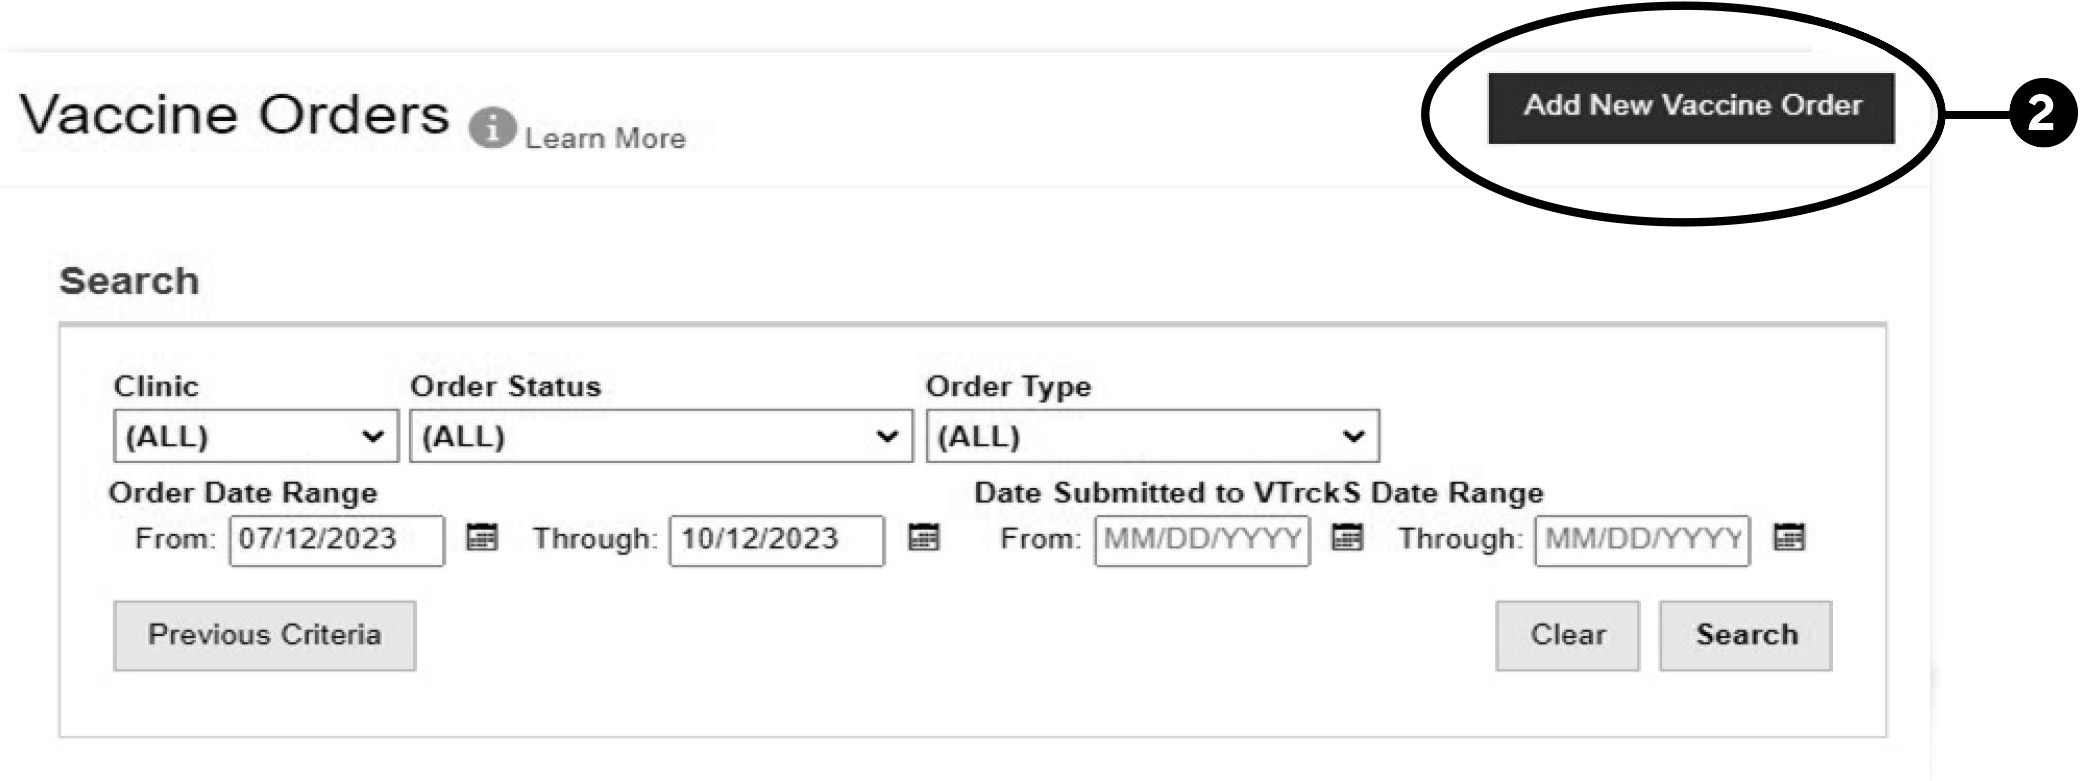
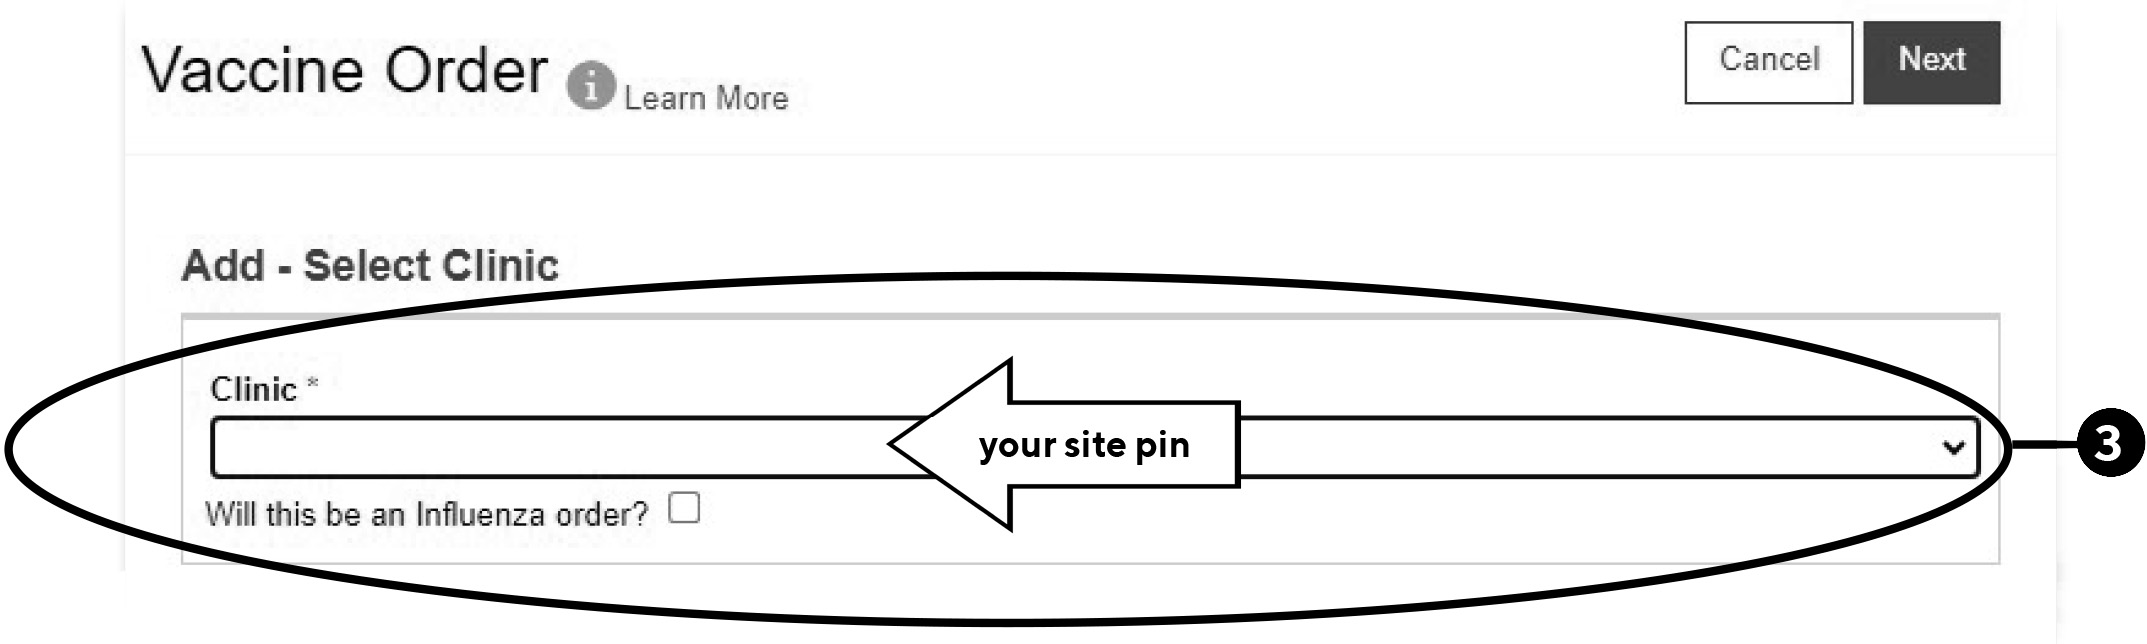
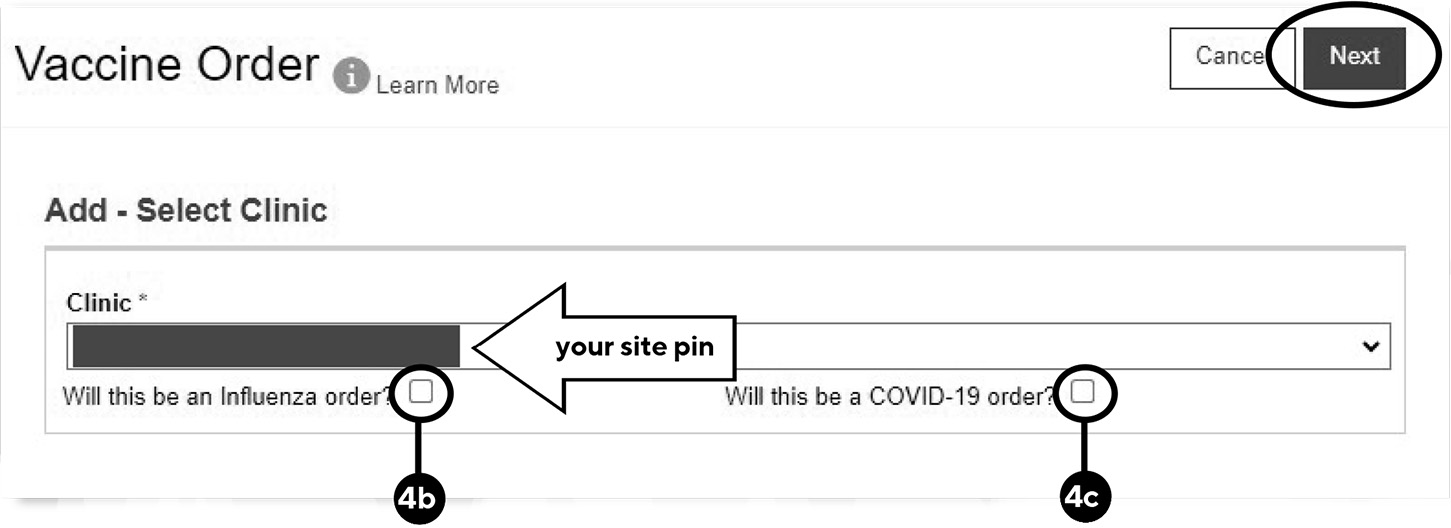
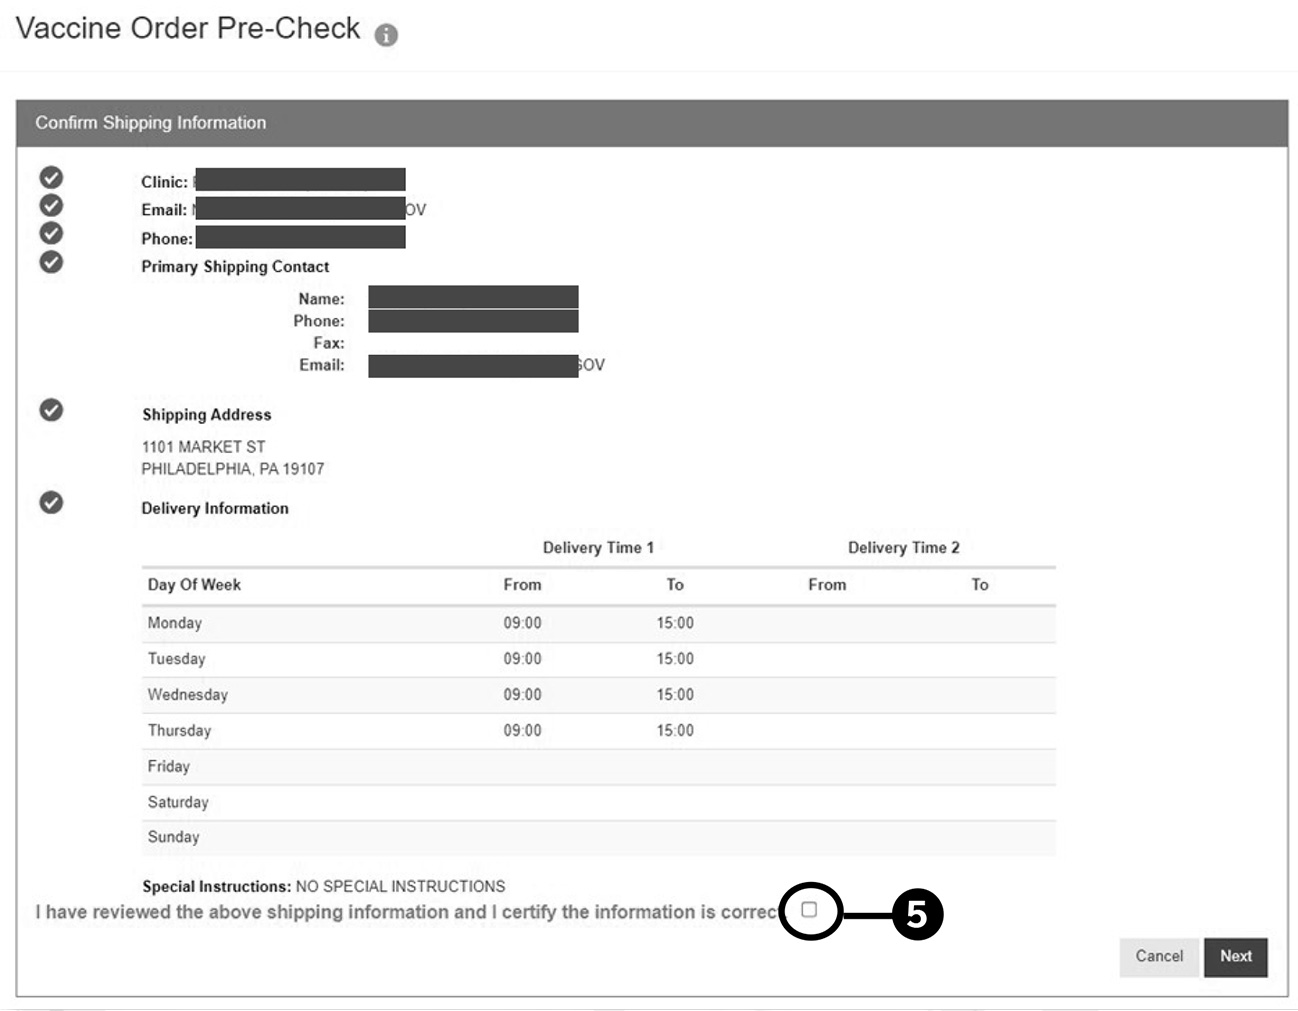
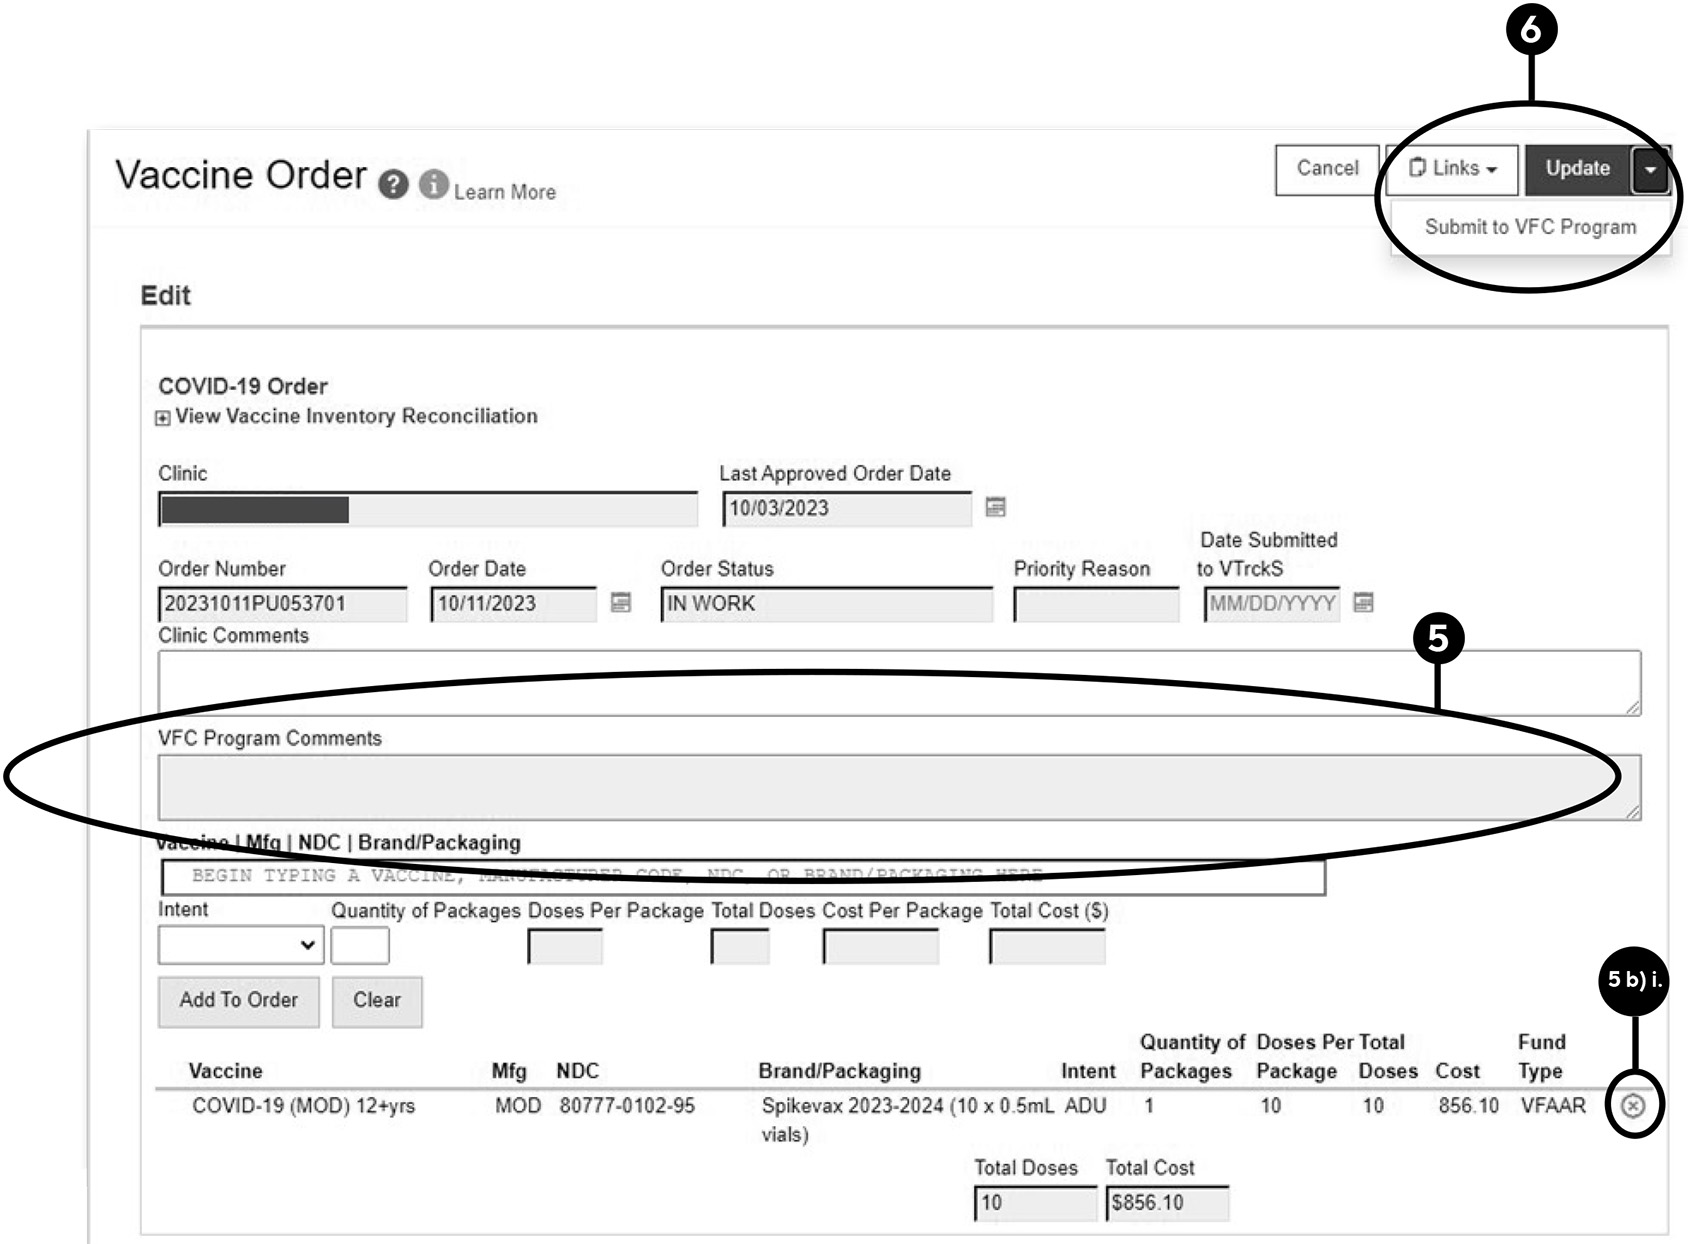
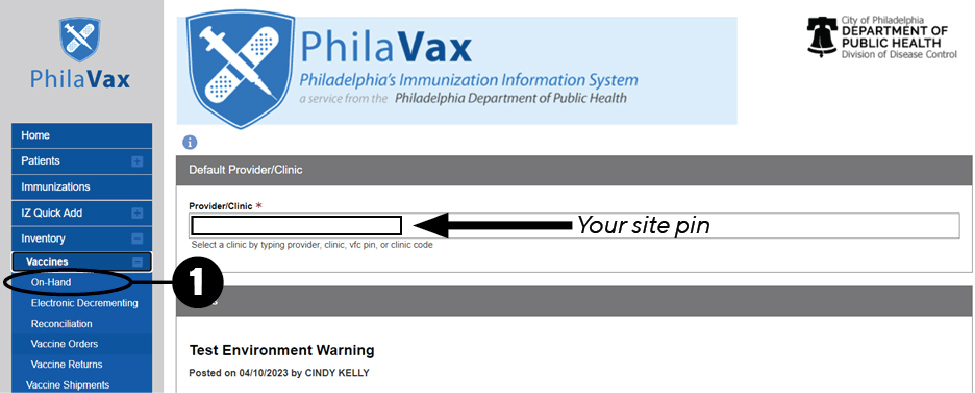
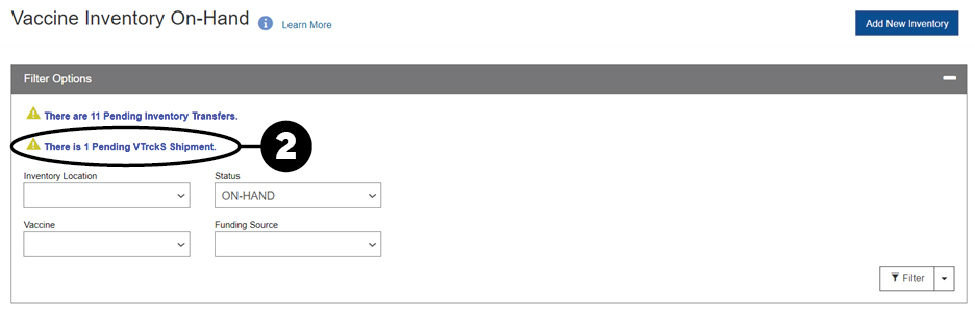
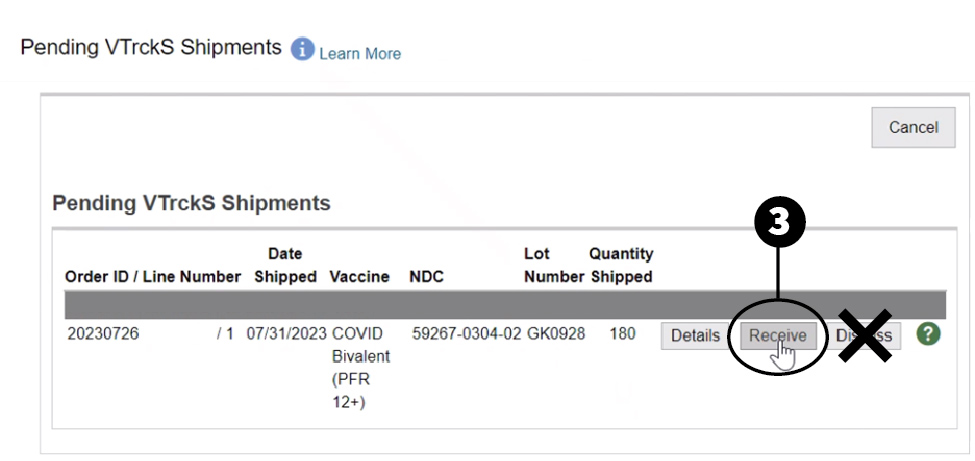
Ordering & receiving vaccine
Vaccine emergency procedures
Resources
Free print materials
Provider? Stay in the know
Get the newest information from the Immunization Program right in your inbox!
Sign up